Invoice template कैसे customise करें (logo, GSTIN, bank, signature)
यह गाइड उन स्कूल अकाउंटेंट और प्रिंसिपल के लिए है जो चाहते हैं कि हर fee invoice PDF स्कूल के letterhead जैसा दिखे — सही logo, पता, GSTIN, bank details और हस्ताक्षर के साथ। अंत में आपके पास Inkwelly में पूरी तरह branded और board-compliant invoice template तैयार होगा जिसे हर आगामी invoice अपने आप उपयोग करेगा।
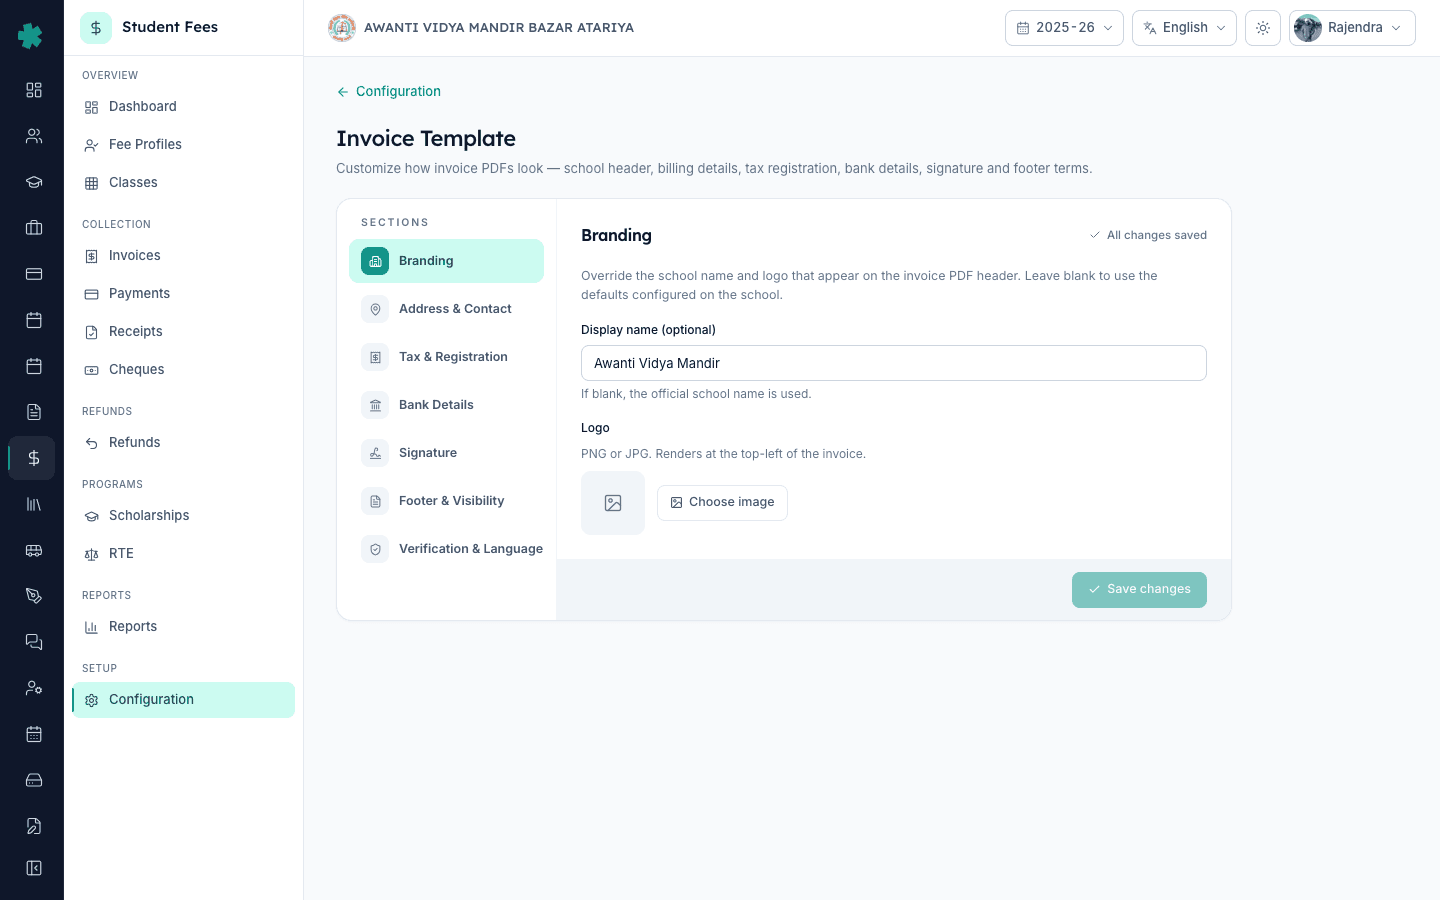
Inkwelly में invoice template customise करने के लिए: Student Fee → Configuration → Invoice Template खोलें, फिर sidebar में दिए सात sections — Branding, Address & Contact, Tax & Registration, Bank Details, Signature, Footer & Visibility, Verification & Language — एक-एक करके भरें — logo, GSTIN, bank IFSC, signatory image और footer terms। Save changes दबाएँ। उसके बाद बनने वाला हर invoice यही template अपने आप उपयोग करेगा।
Inkwelly में invoice template school-level होता है, हर छात्र के लिए अलग नहीं — सत्र की शुरुआत में एक बार सेट कर दें और हर आगामी PDF वही template अपनाएगा। भारतीय CBSE और राज्य बोर्ड के स्कूल हर साल इसी template पर 4,000 से 12,000 fee invoice जारी करते हैं (UDISE+ 2024 का 1,200 छात्रों के स्कूल का finance data) — इसलिए साफ header, CGST Act section 7 के अनुसार सही GSTIN और verifiable signature केवल सजावट नहीं हैं, यही तय करते हैं कि invoice parent dispute, board inspection या fee-cap audit में टिकेगा या नहीं। GST notification 12/2017 के अंतर्गत मान्यता प्राप्त स्कूल की tuition fee exempt है; transport और hostel taxable हैं, इसीलिए केवल tuition लेने वाले स्कूल के लिए भी GSTIN field मायने रखता है।
1. Configuration के अंतर्गत Invoice Template खोलें
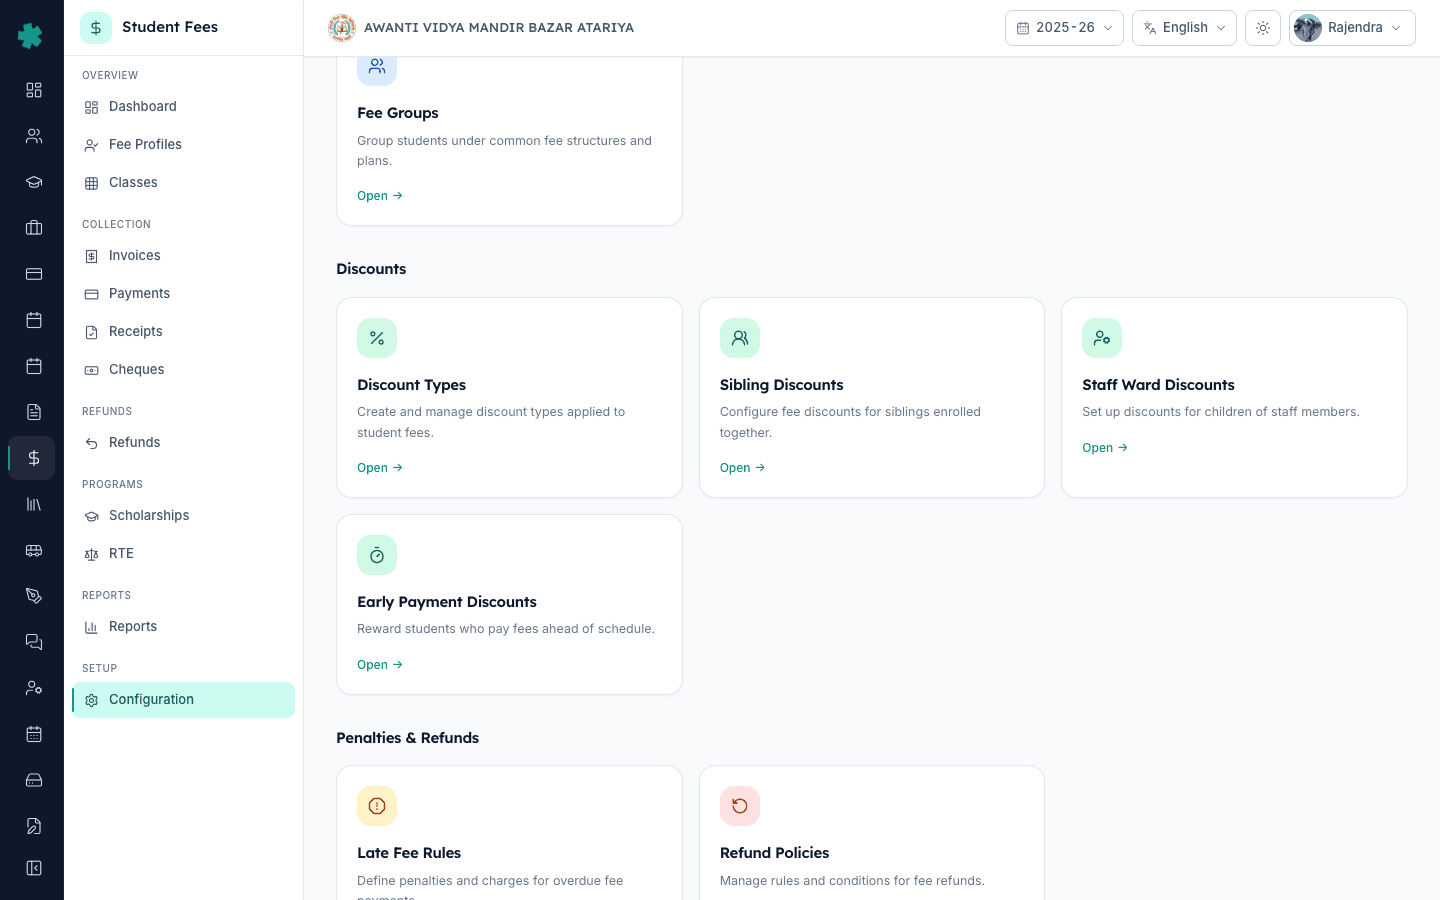
Inkwelly → Student Fee → Configuration खोलें। Configuration पेज पर fee सेटिंग्स चार sections में बँटी होती हैं — Fee Structure, Discounts, Penalties & Refunds और Preferences। Preferences के अंदर Invoice Template tile पर क्लिक करें (subtitle: 'Customize the invoice PDF — header, address, GSTIN, bank details, signature, terms')। Inkwelly सात-tab वाला sectioned editor खोलेगा जिसमें बाएँ sidebar में सेक्शन सूची होती है। पहली बार खुलने पर Inkwelly फॉर्म में स्कूल के default — नाम, पता, email — पहले से भर देता है, ताकि आप वही फील्ड बदलें जो printed invoice पर अलग रखने हैं।
2. Branding में स्कूल का नाम और logo सेट करें
Branding section डिफ़ॉल्ट रूप से खुला होता है। Display name में वही नाम लिखें जिसे invoice पर print होना चाहिए — खाली छोड़ने पर Inkwelly में पंजीकृत official school name से fallback हो जाएगा। Logo के नीचे Choose image क्लिक करें और media library से स्कूल का crest चुनें, या नया PNG upload करें। A4 invoice के top-left पर 300×300 px का PNG transparent background के साथ सबसे साफ दिखता है। यही logo receipt template पर भी प्रयोग होता है, इसलिए एक बार upload करें और Inkwelly हर जगह उपयोग कर लेता है।
3. Address & Contact में पता और संपर्क भरें
Sidebar में Address & Contact पर क्लिक करें। Address line 1 में सड़क या building, Address line 2 में landmark (वैकल्पिक) भरें, फिर City, State और Pincode तीन-column पंक्ति में लिखें। Pincode और phone numbers Latin digits में ही रहें — Inkwelly हर printed surface पर यह नियम लागू करता है। Phone, Email और Website मिलकर वही contact strip बनाते हैं जो स्कूल नाम के नीचे print होती है। जब invoice हाथ में पहुँचता है तो parents यहीं देखते हैं, इसलिए personal नहीं, office phone लिखें।
4. Tax & Registration में GSTIN और PAN भरें
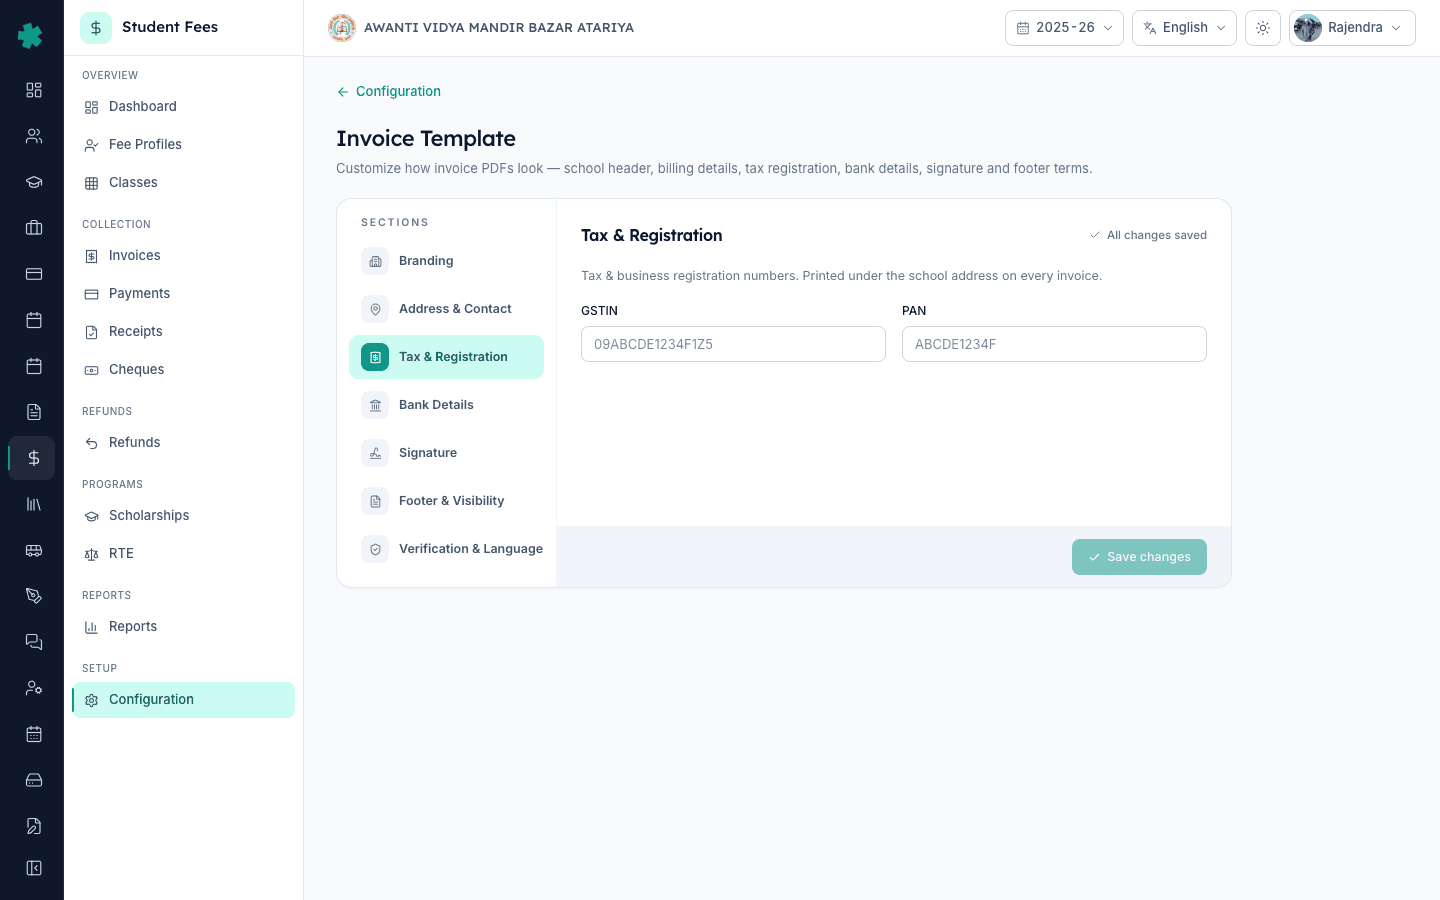
Tax & Registration पर क्लिक करें। 15-character GSTIN लिखें — Inkwelly इसे अपने आप upper case में बदल देता है (CBIC guidelines के अनुसार GST portal भी GSTIN upper case में store करता है)। नीचे 10-character स्कूल PAN भरें। दोनों फील्ड blank रहने पर भी सुरक्षित हैं — यदि आपका स्कूल GST-exempt है और केवल tuition लेता है, तो GSTIN खाली छोड़ दें और Inkwelly printed invoice पर tax row छिपा देगा। सेव होते ही ये नंबर हर invoice पर स्कूल के पते के नीचे दिखेंगे और राज्य बोर्ड द्वारा माँगे जाने वाले income-tax compliance footer में जुड़ जाएँगे।
5. Bank Details में bank जानकारी और visibility toggle करें
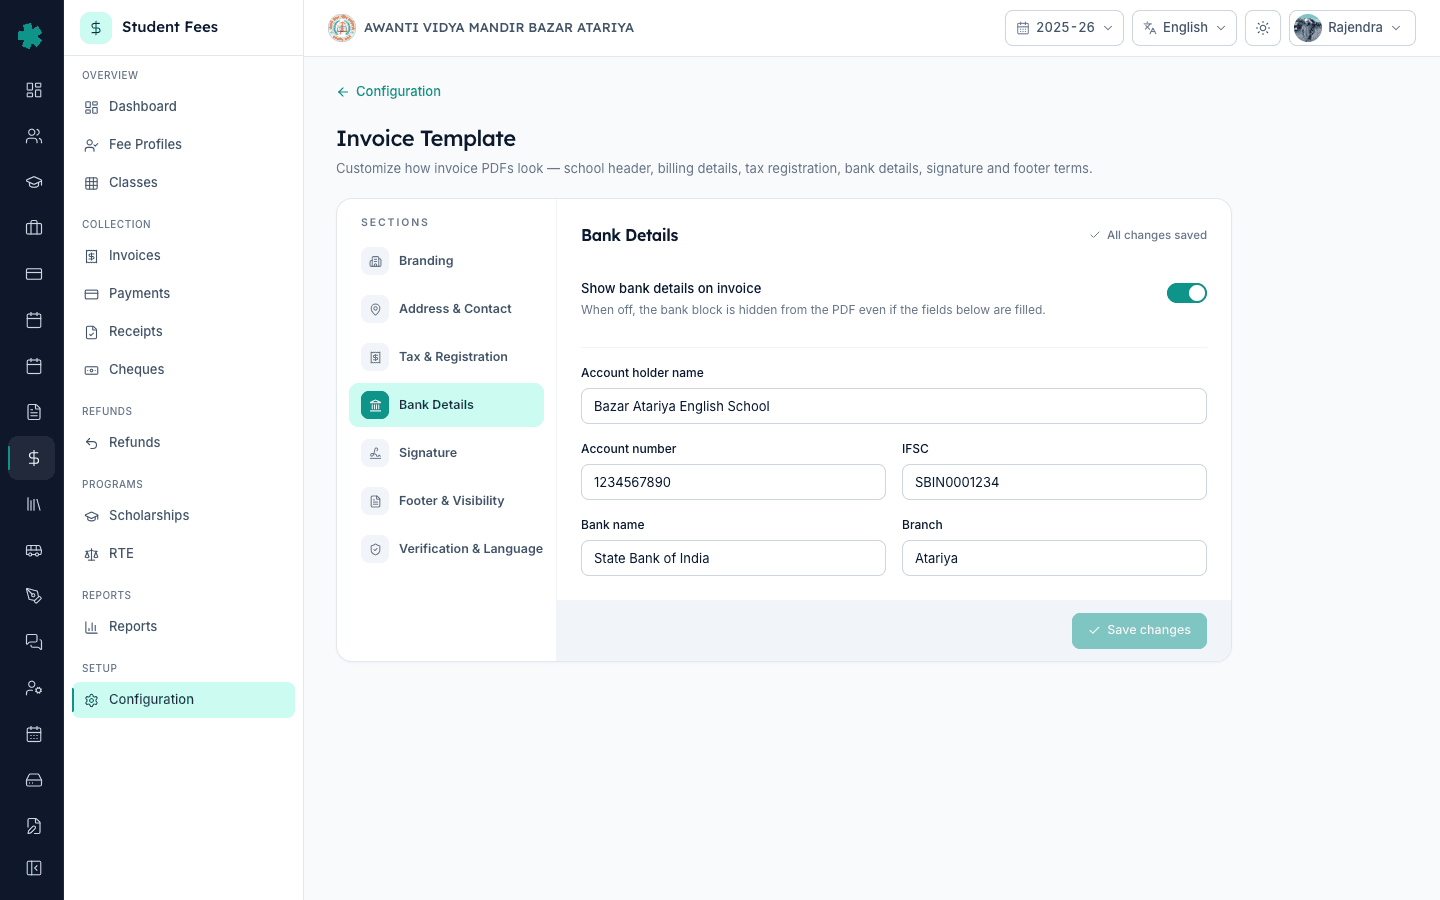
Bank Details पर क्लिक करें। यदि NEFT block PDF पर print करना है तो 'Show bank details on invoice' toggle ऑन रखें; ऑफ करने पर फील्ड internal records के लिए सेव रहेंगे लेकिन PDF पर नहीं दिखेंगे (तब उपयोगी जब स्कूल केवल counter या UPI लेता है)। Account holder name वही लिखें जो bank में registered है, फिर Account number और 11-character IFSC code भरें — IFSC भी अपने आप upper case में बदलता है। नीचे की पंक्ति में Bank name और Branch जोड़ें। Parents इन्हें NEFT screen में copy करते हैं, इसलिए सेव करने से पहले हाल के passbook से IFSC मिला लें।
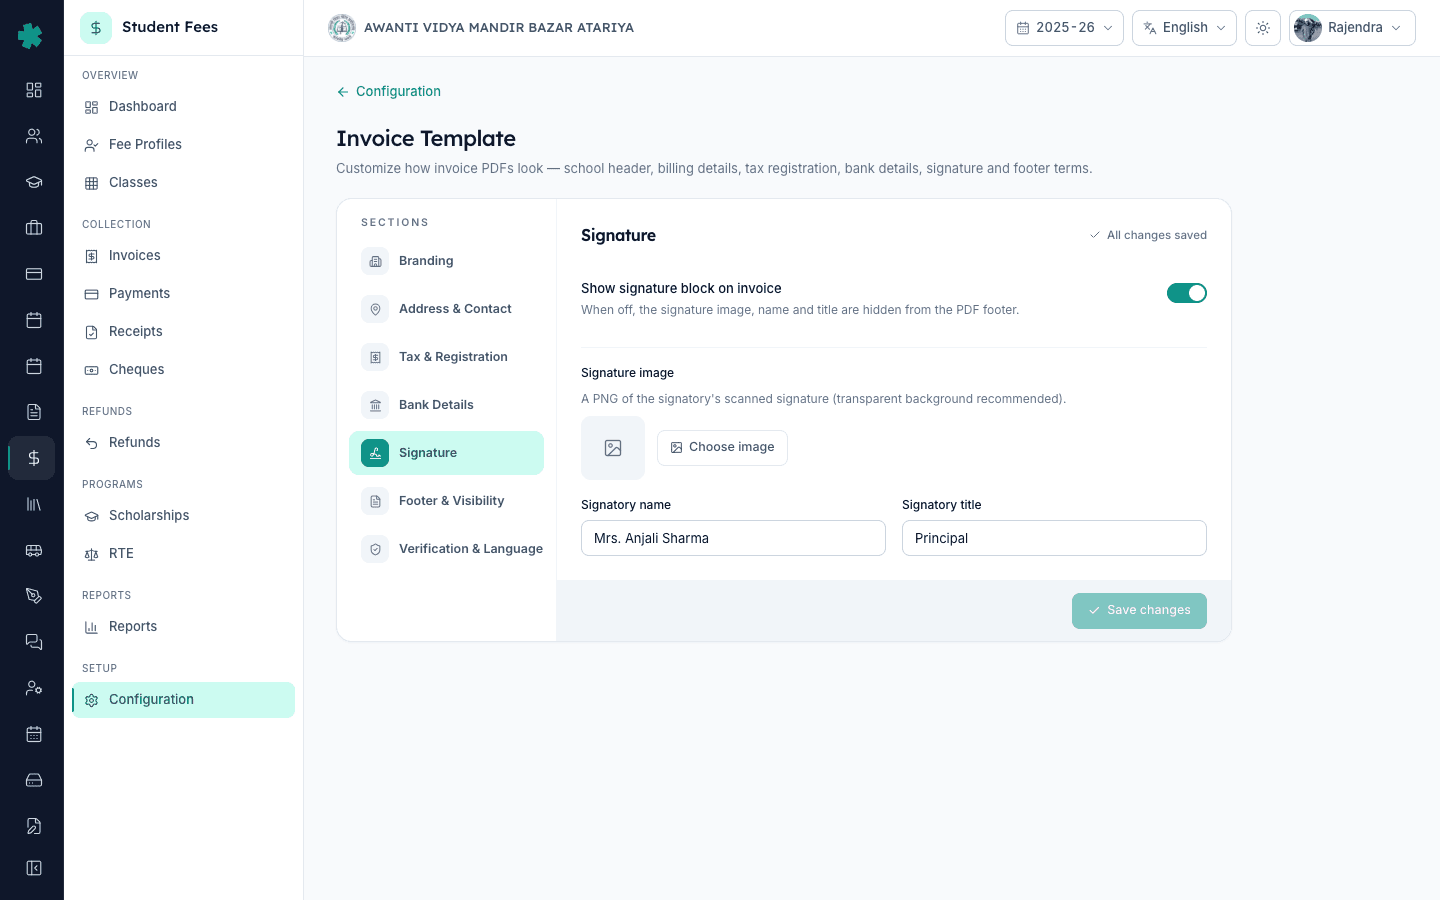
6. Signature section में हस्ताक्षर image और विवरण upload करें
Signature पर क्लिक करें। सामान्य printed invoice के लिए 'Show signature block on invoice' toggle ऑन रखें — ऑफ तब उपयोगी है जब PDF केवल digital भेजना है और स्कूल बाद में मुहर लगाएगा। Signature image के अंतर्गत Principal या accounts head की scanned signature PNG transparent background के साथ upload करें। फिर Signatory name (उदाहरण 'Mrs. Anjali Sharma') और Signatory title ('Principal' या 'Accounts In-Charge') भरें। Inkwelly image, नाम और पद तीनों को PDF के bottom-right पर print करता है — ठीक वहीं जहाँ हस्ताक्षरित receipt होती।
7. Footer terms लिखें और कौन से PDF sections दिखें चुनें
Footer & Visibility पर क्लिक करें। Footer terms में स्कूल की standard शर्तें paste करें — उदाहरण '1. Fees once paid are non-refundable. 2. Cheques subject to realisation. 3. Late fee will be charged after due date.' Inkwelly line breaks बनाए रखता है और field 2000 characters तक स्वीकार करता है। PDF sections के अंतर्गत 'Show late fee charges' को ऑन रखें ताकि invoice पर लागू late-fee दिखें, और 'Show payments received' को ऑन रखें ताकि आंशिक भुगतान भी PDF पर दिखाई दे — दोनों मिलकर parents को साफ दिखाते हैं कि balance ठीक उतना ही क्यों है।
8. Verification QR, status watermark और label language चालू करें
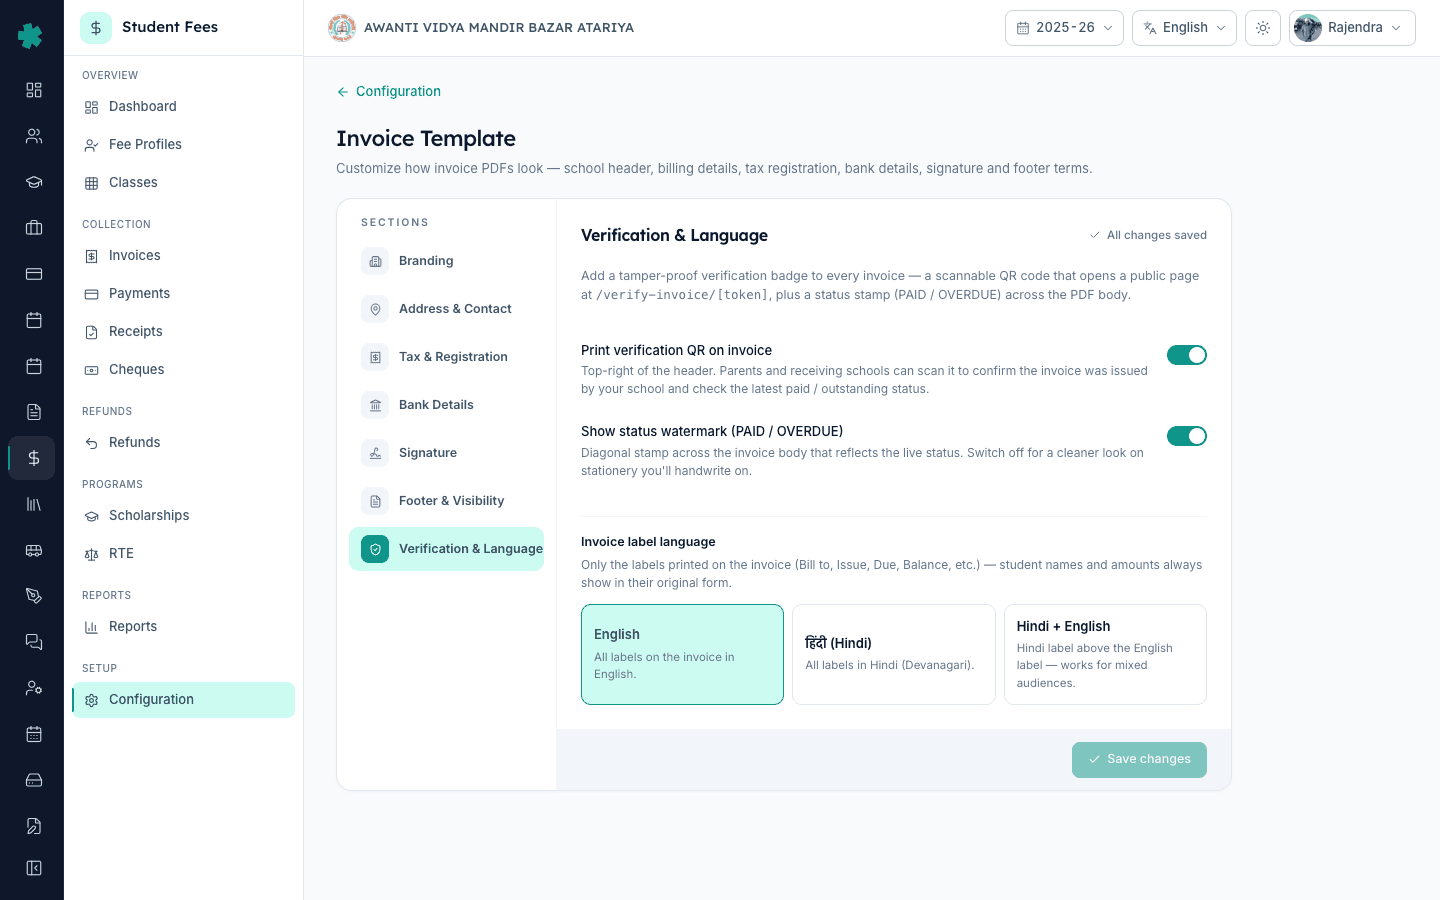
Verification & Language पर क्लिक करें। 'Print verification QR on invoice' toggle ऑन रखें — Inkwelly हर invoice के top-right पर एक QR print करता है जो /verify-invoice/[token] पर एक public page खोलता है, ताकि parents और receiving school यह confirm कर सकें कि invoice आपके स्कूल ने ही जारी किया है। 'Show status watermark' ऑन रखें ताकि body पर diagonal PAID या OVERDUE stamp दिखे। फिर Invoice label language चुनें — English, हिंदी (Hindi) या Hindi + English। Tier-2 और Tier-3 शहर के उन स्कूलों के लिए जहाँ कुछ parents Devanagari पढ़ते हैं और कुछ Latin, Hindi + English सबसे सही विकल्प है। नीचे दाईं ओर Save changes दबाएँ। 'Unsaved changes' indicator बदलकर 'All changes saved' हो जाएगा और हर आगामी invoice PDF यही template उपयोग करेगा।
आगे क्या करें — receipt PDF का template अलग है, इसलिए Configuration → Receipt Template पर जाकर सत्र की पहली cash collection से पहले उसी तरह customise करें। यदि स्कूल fee counter पर thermal slip print करना चाहता है तो QZ Tray और Olivetti printer pairing एक बार सेट करें। इन नए format के invoice को parents तक WhatsApp, SMS या email से भेजने के लिए पहले Razorpay connect कर लें ताकि message में दिख रहा 'Pay now' link live gateway पर जाए — Razorpay जुड़े बिना Inkwelly का invoice-send dialog उस channel पर disabled रहता है।
Inkwelly Student Fees को काम करते हुए देखें
अक्सर पूछे गए सवाल
7 सवालक्या केवल tuition लेने वाले स्कूल को fee invoice पर GSTIN चाहिए?
नहीं। मान्यता प्राप्त स्कूल की tuition fee GST notification 12/2017 के तहत exempt है, इसलिए केवल tuition लेने वाला स्कूल Inkwelly में GSTIN field खाली छोड़ सकता है और printed invoice पर tax row छिप जाएगा। GSTIN तभी जोड़ें जब स्कूल parents से transport, hostel, uniform या stationery का शुल्क भी ले — ये सेवाएँ taxable हैं और invoice पर GSTIN दिखना चाहिए।
Printed invoice पर मेरा logo धुंधला क्यों दिखता है?
Inkwelly logo को उसी size पर print करता है जिस size में upload किया गया हो। A4 पर 100×100 px का logo pixelated दिखेगा। कम से कम 300×300 px (school crest पर text हो तो 600×600 बेहतर) का PNG transparent background के साथ upload करें। Branding section PNG और JPG दोनों स्वीकार करता है — transparency के साथ PNG white invoice header पर अधिक साफ दिखता है।
क्या invoice पर एक signatory और receipt पर अलग signatory रखा जा सकता है?
हाँ। Invoice template और receipt template अलग-अलग हैं — हर एक का अपना Signature section, image, नाम और पद है। ज़्यादातर भारतीय स्कूल invoice पर Principal और receipt पर accounts head को रखते हैं। किसी template पर हाथ से sign और मुहर लगाने की योजना हो तो उस template पर Show signature block toggle ऑफ कर दें।
Inkwelly me invoice par logo aur GSTIN kaise add kare?
Student Fee menu kholiye → sidebar me Configuration par jaiye → Preferences section me Invoice Template tile click kijiye. Left sidebar me Branding par logo upload kijiye (PNG 300×300), phir Tax & Registration tab par 15-character GSTIN aur 10-character PAN bhar dijiye. Niche right me Save changes button dabaiye — agla har invoice naye logo aur GSTIN ke saath print hoga.
क्या template बदलने पर पुराने invoice भी update हो जाते हैं?
नहीं। Inkwelly हर invoice पर वही template stamp करता है जो उस समय active था जब invoice बना, इसलिए पुराने PDF अपने पुराने logo, पता और footer के साथ बने रहते हैं। नया template केवल Save दबाने के बाद बनने वाले invoice पर लागू होता है। यह जान-बूझकर है — board inspector यह अपेक्षा रखते हैं कि हर printed invoice उसी template से मेल खाता हो जो उस तिथि पर लागू था।
Tier-2 शहर के parents के लिए invoice labels Hindi में कैसे करें?
Invoice template के Verification & Language में हिंदी (Hindi) चुनें ताकि labels केवल Devanagari में दिखें, या Hindi + English चुनें ताकि हर label पर English के ऊपर Hindi भी print हो। छात्र के नाम, fee head नाम और राशि हमेशा अपने मूल रूप में ही print होते हैं — केवल Bill to, Issue, Due, Balance जैसे labels की language बदलती है।
Invoice template kaise reset kare default ke liye?
Filhal Inkwelly me ek-click reset nahi hai. Manual reset ke liye Branding, Address, Tax, Bank, Signature, Footer aur Verification sections me jaake fields blank kar dijiye aur Save kar dijiye — Inkwelly fir official school name, default address aur seeded defaults par fallback karega. Footer terms textarea aur logo image alag se hatana padta hai.
आपको ये भी पसंद आ सकता है
3 लेखस्रोत व संदर्भ
- CGST Act 2017 — Section 7 (Scope of Supply) and Notification 12/2017 (Exemption of educational services) · देखा गया 19 May 2026
Tuition और auxiliary school services पर GST के नियम और taxable supply पर GSTIN आवश्यकता परिभाषित करता है।
- CBSE Affiliation Bye-Laws — Chapter VII, Fee Structure · देखा गया 19 May 2026
CBSE-affiliated स्कूलों को itemised fee receipt या invoice जारी करने के लिए अनिवार्य करता है जिसमें स्कूल नाम, पता और प्रबंध समिति द्वारा स्वीकृत fee structure दिखाई दे।
- Companies Act 2013 — Section 12 (Display of name and registered office) and Section 128 (Books of account) · देखा गया 19 May 2026
हर registered entity को (Section 8 company या trust सहित) financial documents पर legal entity का नाम और पता print करने और signed copies books of account के रूप में रखने का दायित्व देता है।
Inkwelly आपके स्कूल पर — खुद देखें
30 मिनट का डेमो। आपके मौजूदा ERP को आपके साथ खोलकर, कॉल पर ही आपका डेटा Inkwelly में लोड करते हैं। कॉल ख़त्म होते-होते एक तय तारीख़ का गो-लाइव प्लान आपके हाथ में।