How to customise the receipt template for A4 fee receipts in Inkwelly
This guide is for the school accountant, fee clerk, and office administrator who hands over a printed fee receipt to a parent every day. By the end you will have an A4 PDF receipt template in Inkwelly with your school name and logo, full address and contact, GSTIN and PAN if applicable, an authorised signature, and a verification QR — ready for the next collection at the counter.
To customise the A4 fee receipt template in Inkwelly: open Student Fee → Configuration → Receipt Template, set Display Name and Logo in the Branding section, fill Address & Contact, add GSTIN and PAN under Tax & Registration, switch to A4 / PDF Receipt to upload the signatory image, set bank details and footer terms, toggle Verification QR on, and click Save changes. One template drives both the A4 PDF and the thermal counter slip.
A printed fee receipt is the only paper proof a parent walks home with after a counter payment, and most disputes that reach the principal's desk trace back to a receipt that did not show the school's full registered name, address, or an authorised signature. The Right of Children to Free and Compulsory Education Act, 2009 requires schools to issue a receipt for every fee collection (Section 13), and CBSE affiliation bye-laws ask affiliated schools to keep auditable financial records for each session. The Inkwelly receipt template is shared across every fee receipt the office prints, so configuring it once at the start of the session removes per-receipt errors for the rest of the year. The same template drives the thermal counter slip — covered in the sibling tutorial — so this is a one-time setup, not a per-printer job.
1. Open Receipt Template under Configuration → Preferences
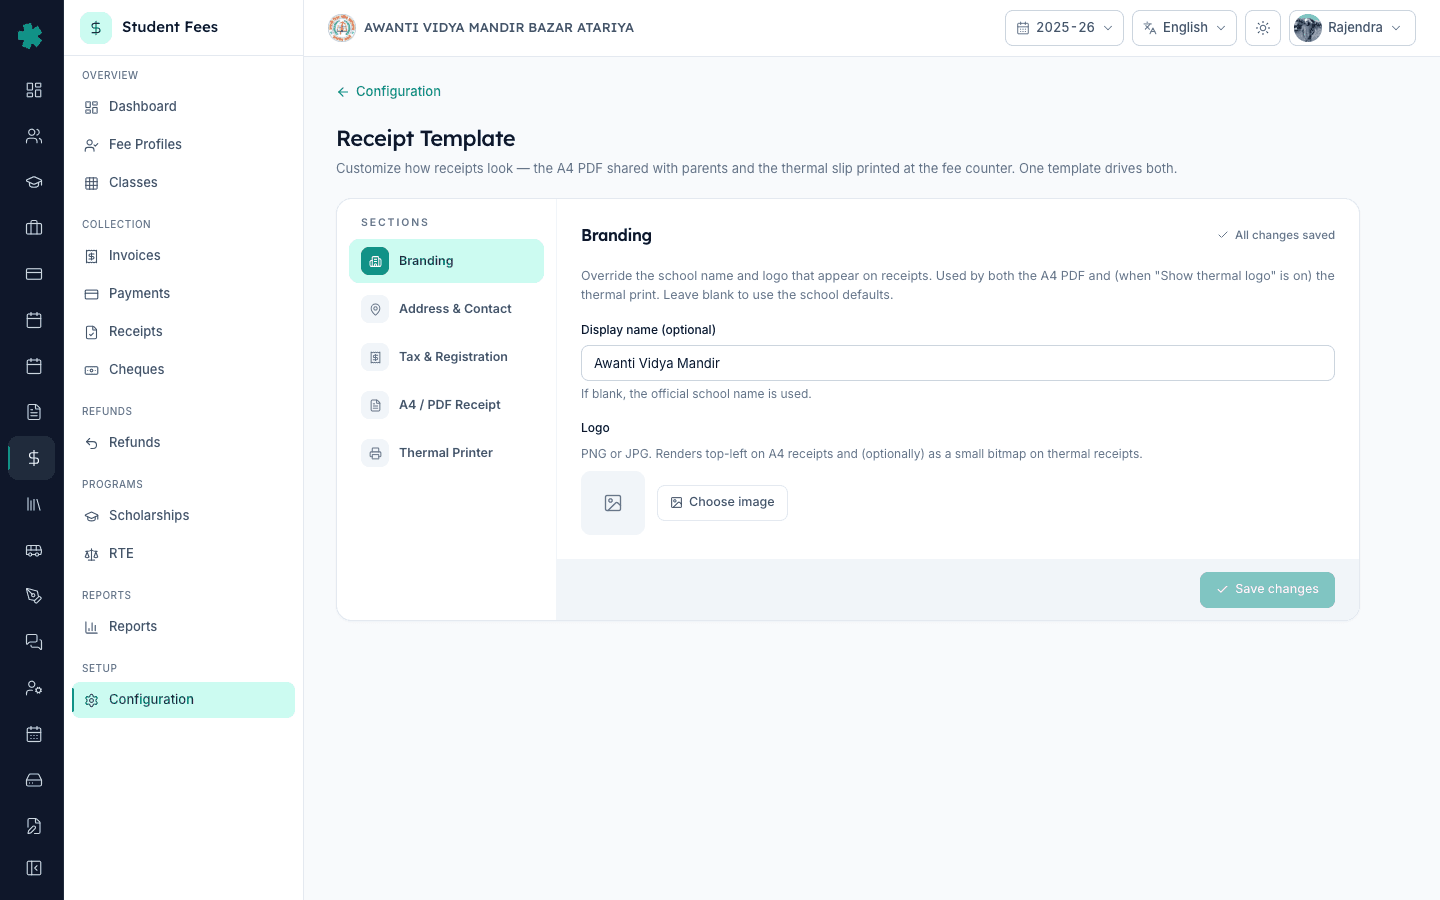
Open Inkwelly → Student Fee from the left sidebar, click Configuration under SETUP, and scroll down to the Preferences section. The Receipt Template tile sits next to Fee Settings and Invoice Template. Click Open. Inkwelly takes you to the Receipt Template page with a left rail listing five sections — Branding, Address & Contact, Tax & Registration, A4 / PDF Receipt, and Thermal Printer. The first four cover the A4 PDF receipt; thermal setup is a separate sibling tutorial.

2. Set the display name and logo under Branding
The Branding section is selected by default. Enter a Display Name only if it differs from the official school name on file — most schools leave this blank so receipts always show the registered name. Click Choose image under Logo and pick a PNG or JPG from the media library; the A4 receipt renders the logo top-left, sized automatically to fit the header band. Logos under 500 KB load fastest. If the logo is wider than tall, Inkwelly preserves the aspect ratio and never stretches the artwork. Once the logo appears in the preview thumbnail, the unsaved-changes pill turns on in the header.
3. Fill Address & Contact
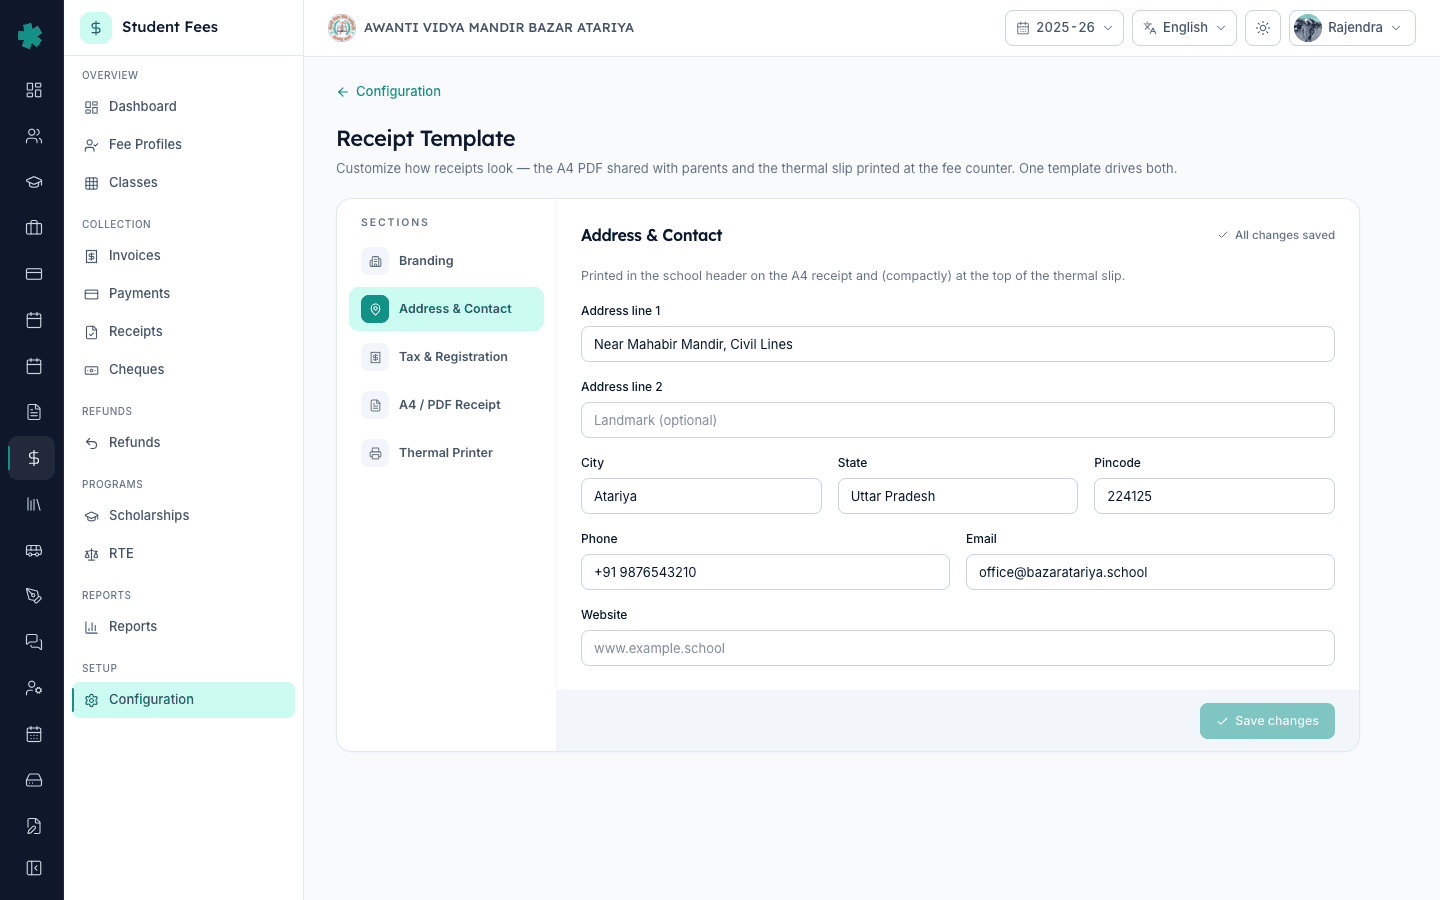
Click Address & Contact on the left rail. Type Address line 1 (street, building, area), Address line 2 for the landmark, then City, State, and Pincode in the three-column row. Phone and Email sit on the next row — use the school's official numbers, not a personal mobile, because parents call the printed number when they have a dispute. Add the Website if the school maintains one. Inkwelly prints this block in the receipt header next to the logo, and pincode validation accepts up to 20 characters so PIN+area codes from any Indian state work.
4. Add GSTIN and PAN under Tax & Registration
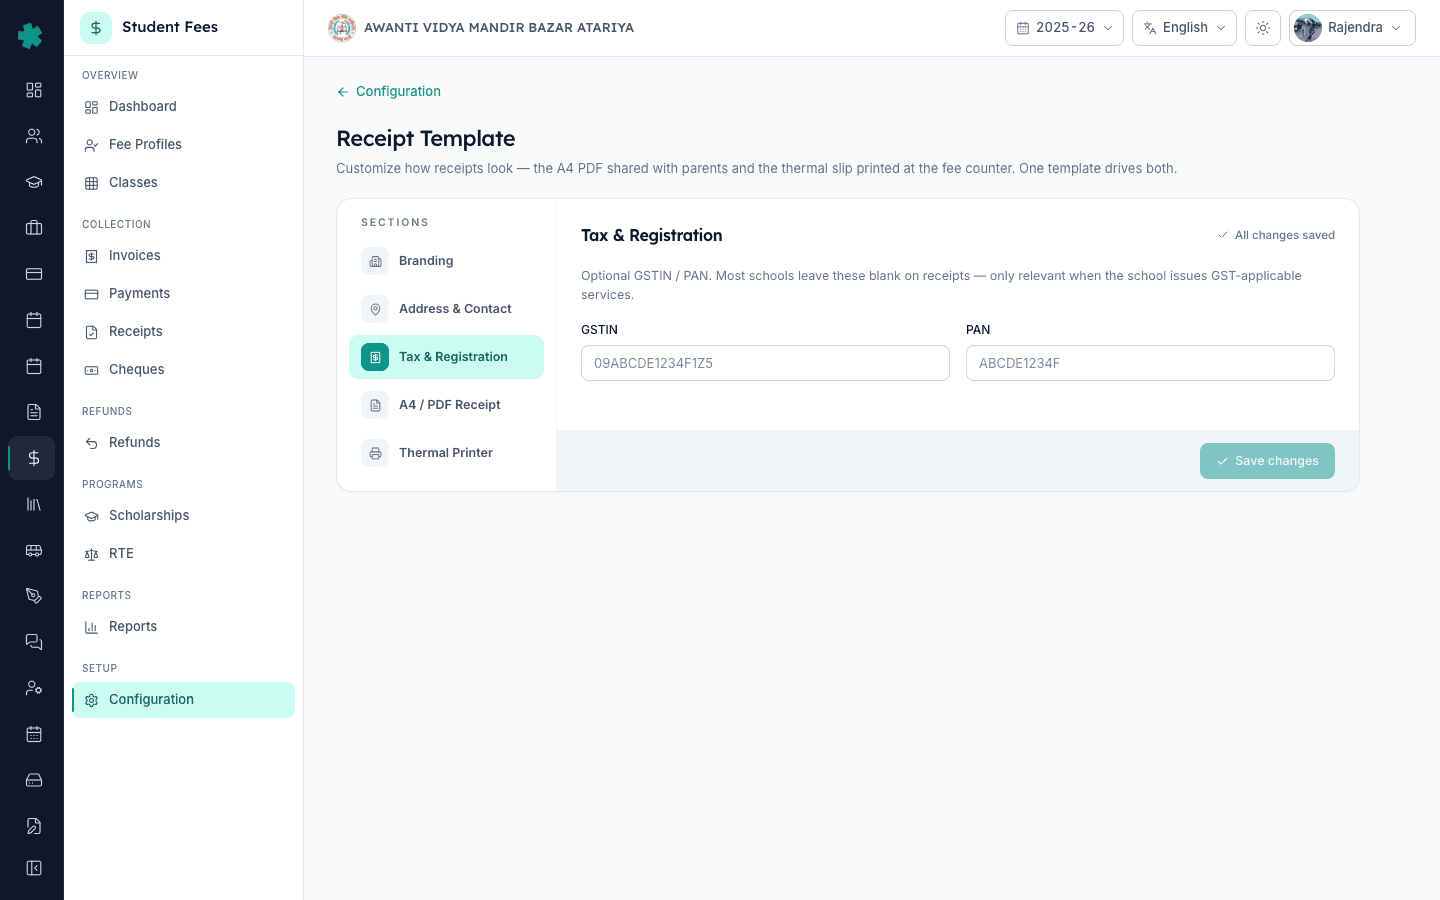
Click Tax & Registration. Enter GSTIN only if the school is GST-registered for any service the parent is paying for — uniforms, transport from a third-party operator, hostel — otherwise leave it blank. Most CBSE day schools do not collect GST on tuition. Inkwelly automatically uppercases the GSTIN as you type so 09abcde1234f1z5 becomes 09ABCDE1234F1Z5. Enter the PAN of the school trust or society in the second field — used for high-value receipts where the parent's accountant asks for it. Both fields show on the A4 PDF only if you fill them; leaving them empty hides the entire Tax block on the printed receipt.
5. Switch to A4 / PDF Receipt and configure the body
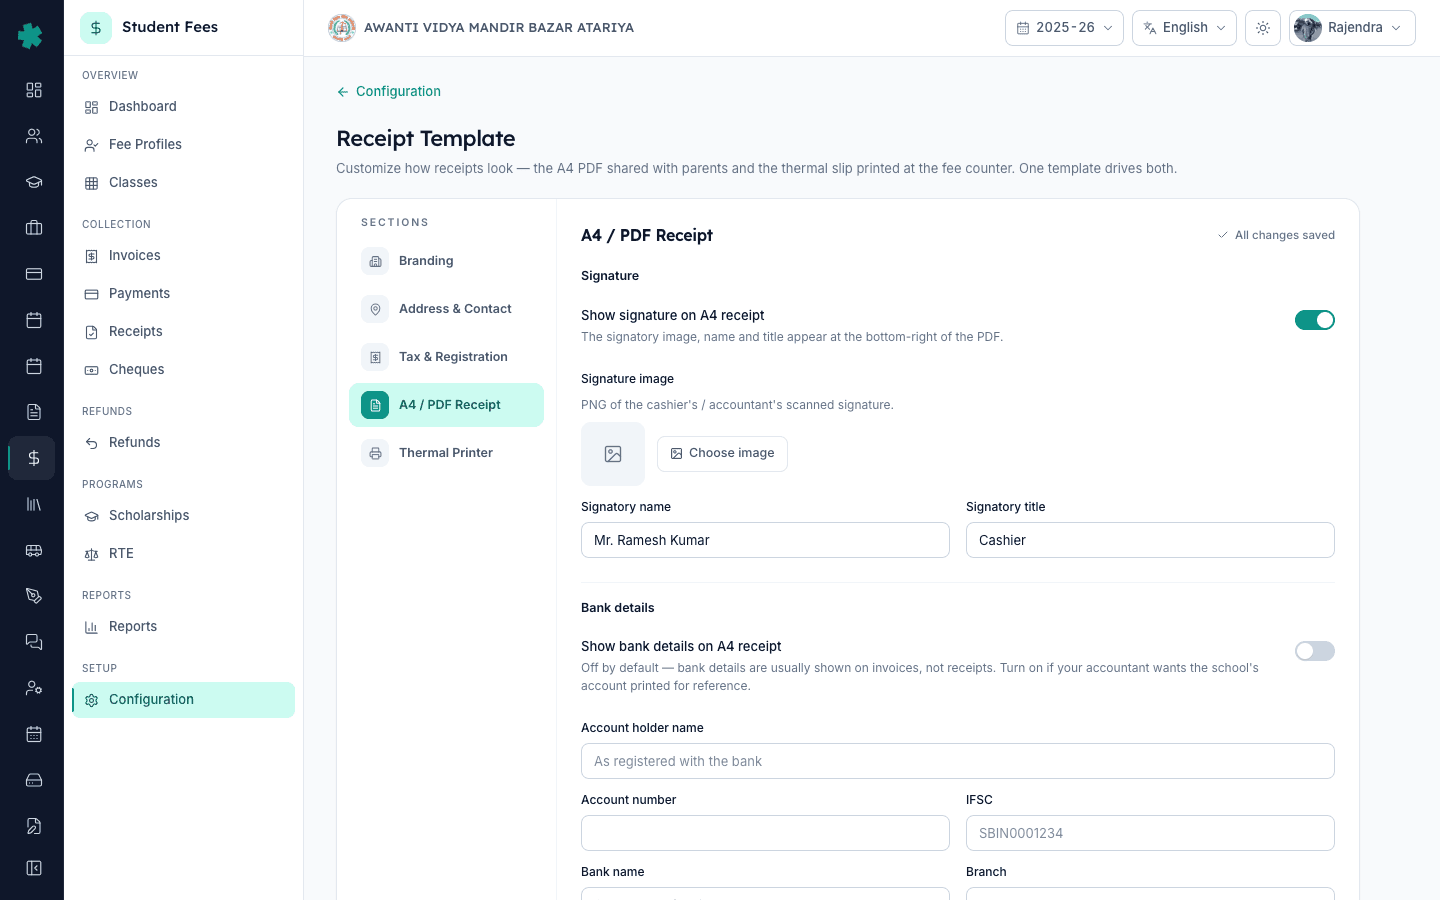
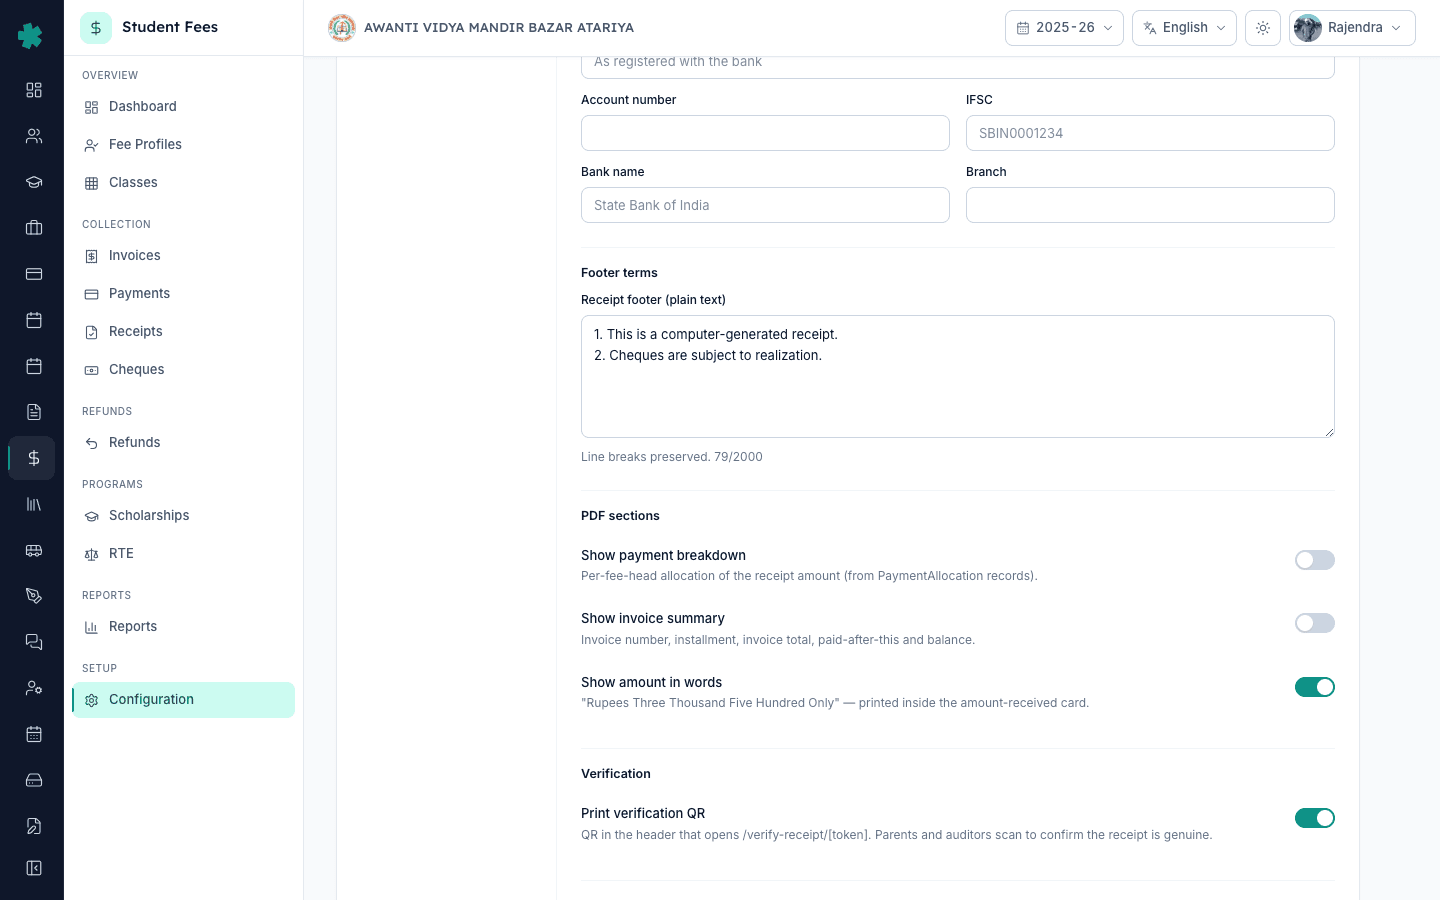
Click A4 / PDF Receipt on the left rail. This section has five blocks the receipt body uses — Signature, Bank details, Footer terms, PDF sections, and Verification. Turn Show signature on if the school wants an authorised signature printed bottom-right; upload a transparent PNG of the cashier or accountant signature, then type the Signatory name (Mr. Ramesh Kumar) and Signatory title (Cashier). Leave Show bank details off unless the principal wants the school's account number printed for parent reference. In the PDF sections block, keep Show payment breakdown, Show invoice summary, and Show amount in words on by default — they are the three details most parents check on receipts.
6. Write footer terms and turn on the verification QR
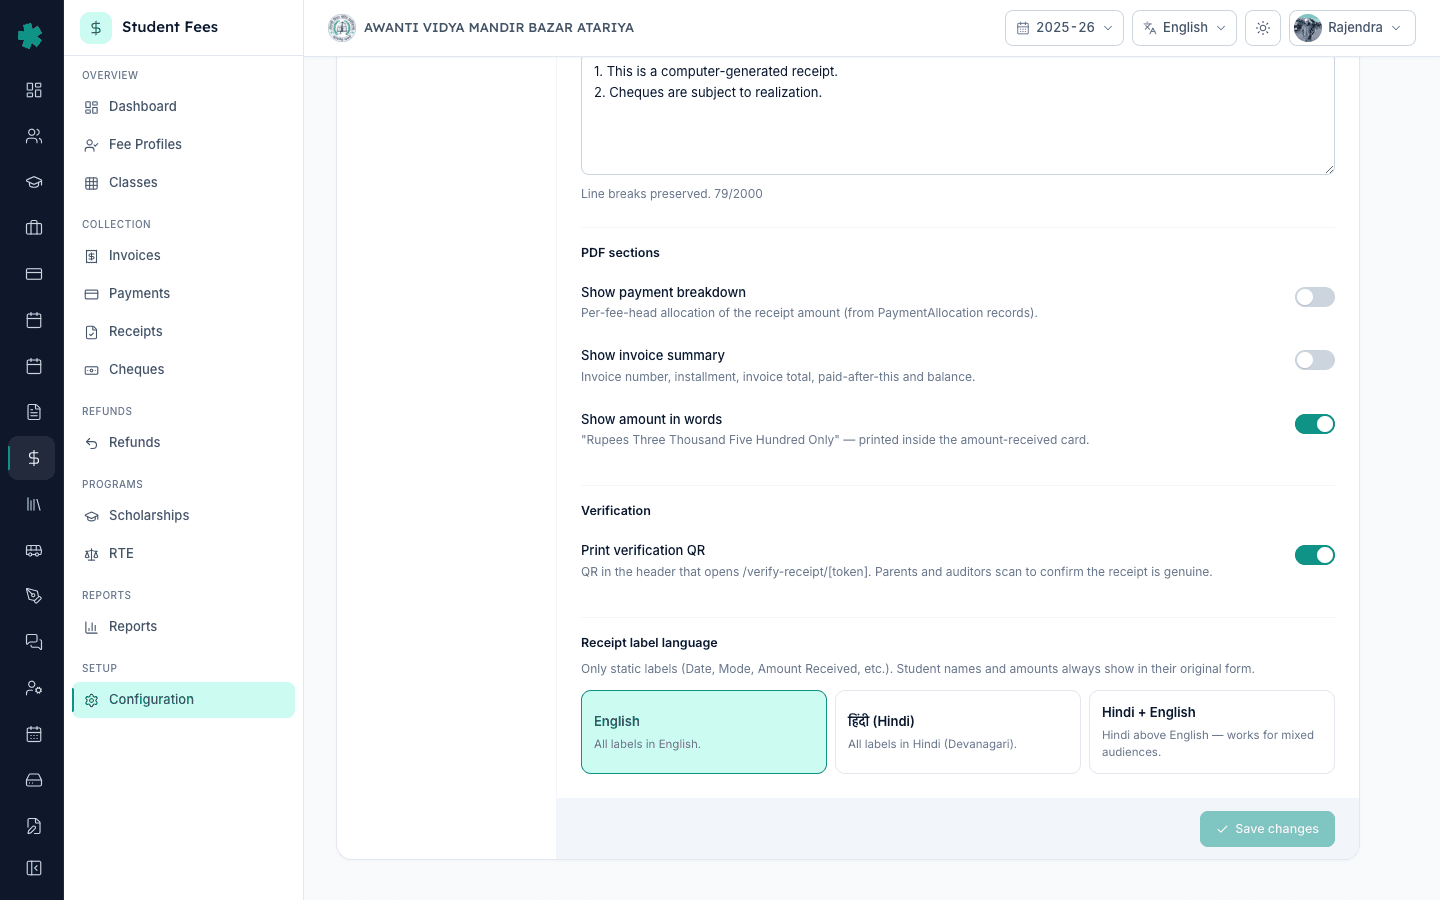
Scroll to Footer terms and type the standard receipt notes the school uses — for example, This is a computer-generated receipt, Cheques are subject to realisation, Original copy to be retained by parent. Line breaks are preserved exactly as typed, and the field allows up to 2,000 characters. In the Verification block, turn Print verification QR on so every A4 receipt prints a QR in the header that opens /verify-receipt/[token]. Parents and auditors scan the QR with any phone camera to confirm the receipt is genuine and was not edited after printing — the single most useful anti-tampering feature on the receipt.
7. Pick the label language and click Save changes
Scroll to the Receipt label language block at the bottom of A4 / PDF Receipt. Choose English for an English-only receipt (most CBSE and ICSE schools), Hindi for a Devanagari-only receipt, or Hindi + English for a bilingual receipt where every label prints in Hindi above its English equivalent. Only static labels (Date, Mode, Amount Received) change — student names and amounts always print in their original form. Click Save changes on the bottom-right footer. Inkwelly shows a Receipt template saved toast and the unsaved-changes pill switches to All changes saved. Print a test receipt from any recent payment to verify the new template renders correctly.
Next steps — set up the thermal counter slip from the same Receipt Template page by following How to set up thermal receipt printing in Inkwelly, then connect Razorpay so parents can also pay online using the steps in How to connect Razorpay to accept online fee payments. Before the next collection cycle, finish the Penalties & Refunds tile by going through How to set up late fee rules and How to create a refund policy with time-based slabs so the office runs on a fully configured fee module.
See Inkwelly Student Fees working in your office
Frequently asked
7 questionsDoes one Inkwelly receipt template cover both A4 PDF and thermal counter slips?
Yes. The Receipt Template page in Inkwelly drives both the A4 PDF receipt parents take home and the thermal slip printed at the fee counter — branding, address, contact, and verification settings apply to both surfaces. The Thermal Printer tab on the same page adds paper size, characters-per-line, and ESC/POS-specific options on top. Configure A4 once for the parent-facing PDF; thermal setup is a sibling tutorial.
Should a school enter GSTIN on the receipt template if it only collects tuition fees?
No. Most CBSE, ICSE, and state-board day schools do not collect GST on tuition and leave GSTIN blank on the receipt template — Inkwelly then hides the entire Tax block on the printed PDF. Enter GSTIN only if the school is registered for GST-applicable services like third-party uniforms, transport, hostel, or catering where the parent's accountant may ask for it.
What size and format should the school logo be for the A4 receipt?
A clean PNG or JPG under 500 KB works best — the file uploads fast and prints sharply. Inkwelly renders the logo top-left in the A4 receipt header at a fixed band height and preserves the aspect ratio, so a wide rectangular logo (a long name plus crest) and a square logo (just the crest) both work without stretching. Avoid photographs; a flat vector-style logo gives the cleanest print.
Inkwelly me fee receipt par school logo aur address kaise add kare?
Student Fee menu kholiye, Configuration par click kijiye, Preferences section me Receipt Template tile Open kijiye. Branding tab pehle se selected hota hai — Choose image dabaiye aur PNG logo upload kijiye. Phir Address & Contact tab par jaiye, school ka address, city, state, pincode, phone, email aur website bhariye. Save changes dabaiye — agle receipt PDF par logo aur address dono print honge.
Receipt par signature aur QR kaise enable kare Inkwelly me?
Receipt Template page kholiye, A4 / PDF Receipt tab par click kijiye. Show signature toggle on kijiye, scanned PNG signature upload kijiye aur signatory ka naam aur title likhiye (jaise Mr. Ramesh Kumar, Cashier). Niche Verification block me Print verification QR on rakhiye — har receipt par ek QR print hoga jise parent ya auditor phone se scan karke /verify-receipt/[token] par receipt ki authenticity check kar sakte hain.
Can the A4 receipt print labels in Hindi for parents who don't read English?
Yes. The Receipt label language block at the bottom of A4 / PDF Receipt has three options — English, Hindi (Devanagari), and Hindi + English. The third option is bilingual: every label like Date, Mode, Amount Received prints in Hindi above its English equivalent, which works best in mixed Hindi-medium and English-medium parent populations. Only static labels switch — student names and amounts always print in their original form.
Will old receipts already issued change when I update the receipt template?
Yes, every receipt PDF in Inkwelly renders against the current template at print time, so reprinting an old receipt picks up the new logo, address, signature, and footer. The underlying receipt record — receipt number, date, student, amount, mode — never changes. Most schools find this is the desired behaviour because a corrected address or signature shows on past receipts during audits without re-issuing each one.
You might also like
3 readsSources & references
- Right of Children to Free and Compulsory Education Act, 2009 — Section 13 (No capitation fee) · accessed 19 May 2026
The RTE Act prohibits collecting any fee outside the published structure and effectively requires schools to issue a documented receipt for every collection, making a configured receipt template a compliance requirement.
- CBSE Affiliation Bye-Laws — Chapter VII, Financial Records · accessed 19 May 2026
CBSE bye-laws require affiliated schools to maintain auditable financial records and issue receipts that show the school's registered name, address, and authorised signature for every fee collection.
- Central Goods and Services Tax Act, 2017 — Section 31 (Tax Invoice) · accessed 19 May 2026
Section 31 of the CGST Act requires registered entities to display GSTIN on every receipt or invoice issued for a GST-applicable supply — relevant when a school collects fees for transport, hostel, or other GST-applicable services.
See Inkwelly on your school
30-minute demo. We open your current ERP with you and load your data into Inkwelly on the call. Dated go-live plan by the end of it.